Recently I’ve been working more with Unreal and decided to spend some time writing a plugin for the movie render queue that would output an otio file. OpenTimelineIO is the standard file format we use for cuts in editorial. An otio file contains information about clip order and length, with references to external media files. The Movie Render Queue is a tool in unreal that allows you to queue up and render out Level Sequences from the engine.
Source code of my plugin: https://github.com/mvanneutigem/UnrealOtioExporter
This plugin is written in C++ because it currently isn’t possible to extend the Movie Render Queue in Unreal using the python API, at least as far as I’m aware. This meant I had to use the C++ API of OpenTimelineIO as well, which proved a bit tricky since at the time there weren't really any examples floating around, resulting in a bit of trial and error on my end.
Getting started
To be able to develop for Unreal Engine you will need to install the latest version of the engine (or at least 4.25+, as this is where the Movie Render Queue was introduced). You will also need visual studio, you can get visual studio community for free. Once these are installed you can create a new project, you don’t need the starter content, but you will need to enable to movie render queue plugin.
Now, the easiest way to get started with writing C++ code is to open up the project in Unreal and go to the “File” menu and select “New C++ class”. Next you can select a class to inherit from, in my case I wanted to inherit from the “UMoviePipelineOutputBase” class, which is a subclass of the "UMoviePipelineSetting". You should now have a new folder under your main project folder called "Source".
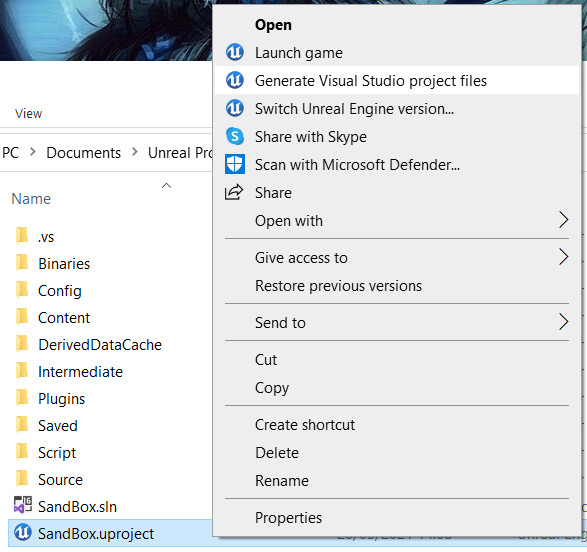
But before you start coding you will want to generate the visual studio project files to have an easier time compiling:
You can do this by right clicking the .uproject file, or from the commandline like so;
"<AbsoluteEnginePath>Binaries\DotNET\UnrealBuildTool.exe" -projectfiles -project="<FullPathToUprojectFile>" -game -rocket -progress
Now you should have an .sln file you can double click to open the project in visual studio.
Inside of the "Source" folder you should find two target .cs files (we can skip those for now), and another folder. This folder should be named the same as your project, this is your main module. When you open up this folder you will find the C++ class you created (It may be inside the private/public folders depending on what you selected when you created the class). There should also be a build.cs file here.
The build.cs file is used to add dependencies to your module. Any modules you want to use in your code should be listed here, else you will run into trouble during compilation;
PublicDependencyModuleNames.AddRange(
            new string[]
            {
                "Core",
                "Projects",
                "MovieRenderPipelineCore",
                "MovieSceneTools",
                "MovieSceneTracks",
                "LevelSequence",
                "MovieScene",
                "opentimelineio",
                // ... add other public dependencies that you statically link with here ...
            }
);
If you go back up to the main project folder and open up your main .uproject file you will find there is now an entry for the main project module listed in there as well. This will tell unreal what modules and plugins to load into your project.
Implementing the setting
To create a custom setting for the Movie Render Queue you have to inherit from a class called the UMoviePipelineSetting (or any of it's subclasses).
Next you will have to implement at least the base functions, these will tell Unreal whether the setting will be valid to execute on individual level sequences (Shots) and/or "Master" Level Sequences (Sequences). You can do this directly in the header as they return simple booleans.
protected:
    virtual bool IsValidOnShots() const override { return false; }
    virtual bool IsValidOnMaster() const override { return true; }
Now you can add the logic you want your setting to execute, this logic should live in the "BeginExportImpl()" function, which you can override in the header;
virtual void BeginExportImpl() override;
And you can add the actual implementation of the function in the cpp file, for a simple test you can log something to the output to make sure the function is actually getting run before you start adding any complex logic.
void UMoviePipelineOtioExporter::BeginExportImpl()
{
    UE_LOG(LogMovieRenderPipeline, Log, TEXT("Running OtioMoviePipelineSetting OTIO export"));
}
Now you can compile your code, you can either do this by simply clicking the compile button above the viewport in unreal. Or by browsing to your module from the "Windows->Developer Tools->Modules" panel and clicking compile. Or alternatively running the project from inside visual studio, which has the added benefit of attaching the visual studio debugger as well.
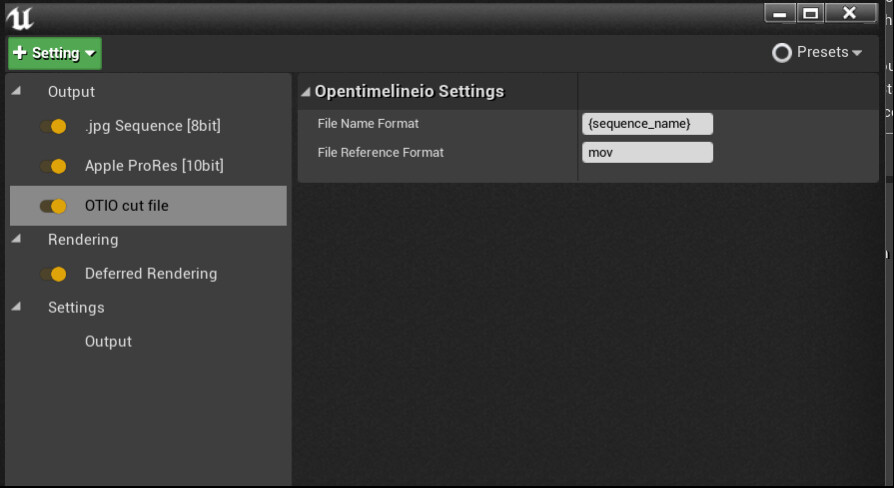
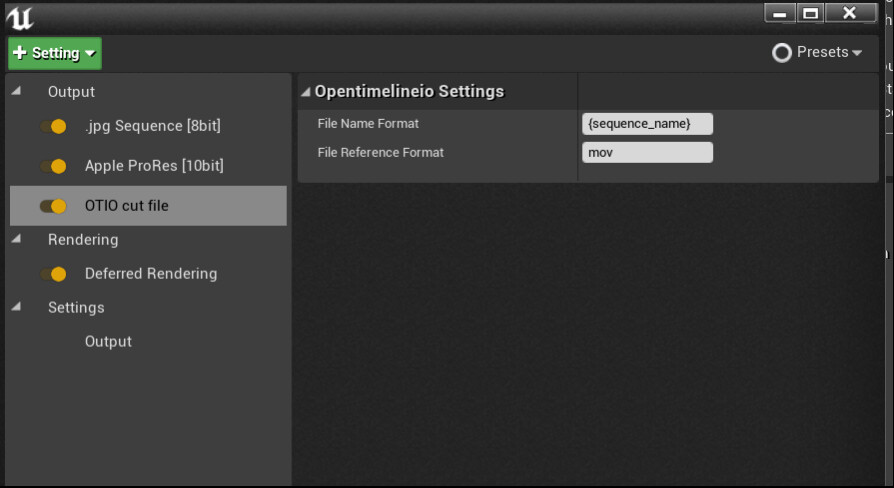
When your code has compiled successfully the option should become available for you to use in the movie render queue. Open the Movie Render Queue dialog from the "windows" menu, next add a level sequence and click the preset which will bring up another window. Then click "+ Setting" and it should be listed there.
To see the output, you will need to bring up the output window which you can find under "Windows->Developer tools->output log".
Note: You can also use the output log to test your python code, when you click the "cmd" button in the lower left corner it will switch to python and allow you to directly execute your python commands in the editor.
To expose settings in the GUI of your newly created setting you need to declare them as variables in your setting's header file. You can also specify a category for each property, this can be any string and is used to bundle settings together visually.
UPROPERTY(EditAnywhere, BlueprintReadWrite, Category = "Opentimelineio settings")
    FString FileNameFormat;
UPROPERTY(EditAnywhere, BlueprintReadWrite, Category = "Opentimelineio settings")
    FString FileReferenceFormat = "jpeg";
Including third party code
To include third party code, you can either include the entire source code, or you can compile your cpp files into a library. In this case I did the latter. You can use visual studio to do this, opentimelineio comes with a make file you can right click, all you need to do is specify the target (in my case windows x64) and it will generate the dll's, lib's and headers.
If you are wanting to create a plugin you can get an example of the structure by creating a new plugin from the "Plugins" dialog and selecting the "third party" option.
To start from scratch you should add the new module as an entry in your uproject (or uplugin) file, the name specified here should match what you named the module folder and class files, "opentimelineio" in my case.
 "Modules": [
    {
      "Name": "RenderQueueOtioOption",
      "Type": "Runtime",
      "LoadingPhase": "Default",
      "WhitelistPlatforms": [
        "Win64"
      ]
    },
    {
      "Name": "opentimelineio",
      "Type": "Runtime",
      "LoadingPhase": "Default",
      "WhitelistPlatforms": [
        "Win64"
      ]
    }
  ],
Once you have compiled your third party code you can create a new folder called "thirdparty" in your Source folder, and underneath it replicate the folder structure as was present in the main module that unreal created for you. It should have a folder containing a build.cs file, a header and cpp file for your module, and all the third party files you wish to include (headers, lib's, dll's).
In the build.cs file you should specify the locations of your header files.
PublicIncludePaths.AddRange(
    new string[] {
        // ... add public include paths required here ...
        "$(PluginDir)/Source/ThirdParty/opentimelineio/include",
        "$(PluginDir)/Source/ThirdParty/opentimelineio/include/opentimelineio/deps",
    }
);
As well as adding the dll's and lib's as dependencies, these are specific to your target platform so we have to check this matches.
if (Target.Platform == UnrealTargetPlatform.Win64)
{
    // Add the import library
    PublicAdditionalLibraries.Add("$(PluginDir)/Source/ThirdParty/opentimelineio/opentimelineio.lib");
    PublicAdditionalLibraries.Add("$(PluginDir)/Source/ThirdParty/opentimelineio/opentime.lib");

    // Delay-load the DLL, so we can load it from the right place first
    PublicDelayLoadDLLs.Add("opentimelineio.dll");
    PublicDelayLoadDLLs.Add("opentime.dll");

    // Ensure that the DLL is staged along with the executable
    RuntimeDependencies.Add("$(PluginDir)/Source/ThirdParty/opentimelineio/opentimelineio.dll");
    RuntimeDependencies.Add("$(PluginDir)/Source/ThirdParty/opentimelineio/opentime.dll");
}
Next we should fill out the header and cpp file for your third party module, to actually load the third party code library. This can be fairly minimal, just a basic class inheriting from the IModuleInterface with a variable to store the library handle.
#pragma once
#include "Modules/ModuleManager.h"

class FopentimelineioModule : public IModuleInterface
{
public:
    /** IModuleInterface implementation */
    virtual void StartupModule() override;
    virtual void ShutdownModule() override;
private:
    /** Handle to the test dll we will load */
    void*    ExampleLibraryHandle;
};
In the cpp file of this third party module you can try to load the library and create a popup if it failed. You can do this in the StartupModule function.
ExampleLibraryHandle = !LibraryPath.IsEmpty() ? FPlatformProcess::GetDllHandle(*LibraryPath) : nullptr;
if (!ExampleLibraryHandle)
{
    FMessageDialog::Open(EAppMsgType::Ok, LOCTEXT("ThirdPartyLibraryError", "Failed to load otio library"));
}
Dont forget to free up the memory in the ShutdownModule function.
FPlatformProcess::FreeDllHandle(ExampleLibraryHandle);
You should now be able to use the third party library in your main module's code (don't forget to add the newly created module as a dependency in your main modules build.cs file!).
OpenTimelineIO
As mentioned before, the opentimelineio C++ api was a bit tricky for me to use. The main thing that tripped me up was the way memory is managed in opentimelineio, you're required to make use of so called "Retainer" objects to hold your objects. These retainer objects will make sure that your objects don't get deleted until you take back ownership of them for clean up.
// we store the timeline in a container, if we dont do this we run into issues when trying to write out the file.
auto otioTimeline = otio::SerializableObject::Retainer<otio::Timeline>(
    new otio::Timeline(
        masterSequenceName,
        otio::RationalTime(startTime.Value / tickResolution.Numerator, displayRate.AsDecimal())
    )
);
If you don't make use of the retainer object you will run into heap memory error's as the objects get deleted twice when you try to write it out to a file. Once by opentimelineio, and once by the unreal garbage collection it seems.
otio::ErrorStatus errorStatus;
if (!otioTimeline.value->to_json_file(otioFilePathStr, &errorStatus))
{
    FString errorMessage = UTF8_TO_TCHAR(
        (otio::ErrorStatus::outcome_to_string(errorStatus.outcome) + ": " + errorStatus.details).c_str()
    );
    UE_LOG(LogMovieRenderPipeline, Error, TEXT("OTIO Error: %s"), *errorMessage);
}
At the end of the function you should call "take_value" on the retainer object to take back ownership of it, which removed the crashing for me.
otio::Timeline* timeline = otioTimeline.take_value();
Additional docs
Movie Render Queue: https://docs.unrealengine.com/en-US/RenderingAndGraphics/RayTracing/MovieRenderQueue/index.html
OpenTimelineIO: https://github.com/PixarAnimationStudios/OpenTimelineIO
Lastly I just wanted to mention I'm still learning every day so if you notice any mistakes let me know!


